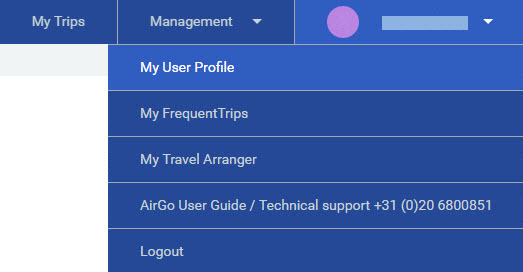
In the top right you will find a drop down menu with "My User Profile", "My Frequent Trips", "My Travel Arranger", "AirGo user Guide" and "Logout".
In"My User Profile" you will find your personal information and settings.
In "My Frequent Trips" you are create a template of your frequent trips. see how in: 6. Adding FrequentTrips
In "My Travel Arranger" you can add an Arranger to your profile. That person will be able to book your trips.
The "AirGo User Guide will bring you back to this page.
Logout
2. Update your personal information
Make sure to update your personal information to make the booking process easier.
3. Set language to English
Go to "Personal Preferences"
And set your language to English.
This will make navigating the site easier.
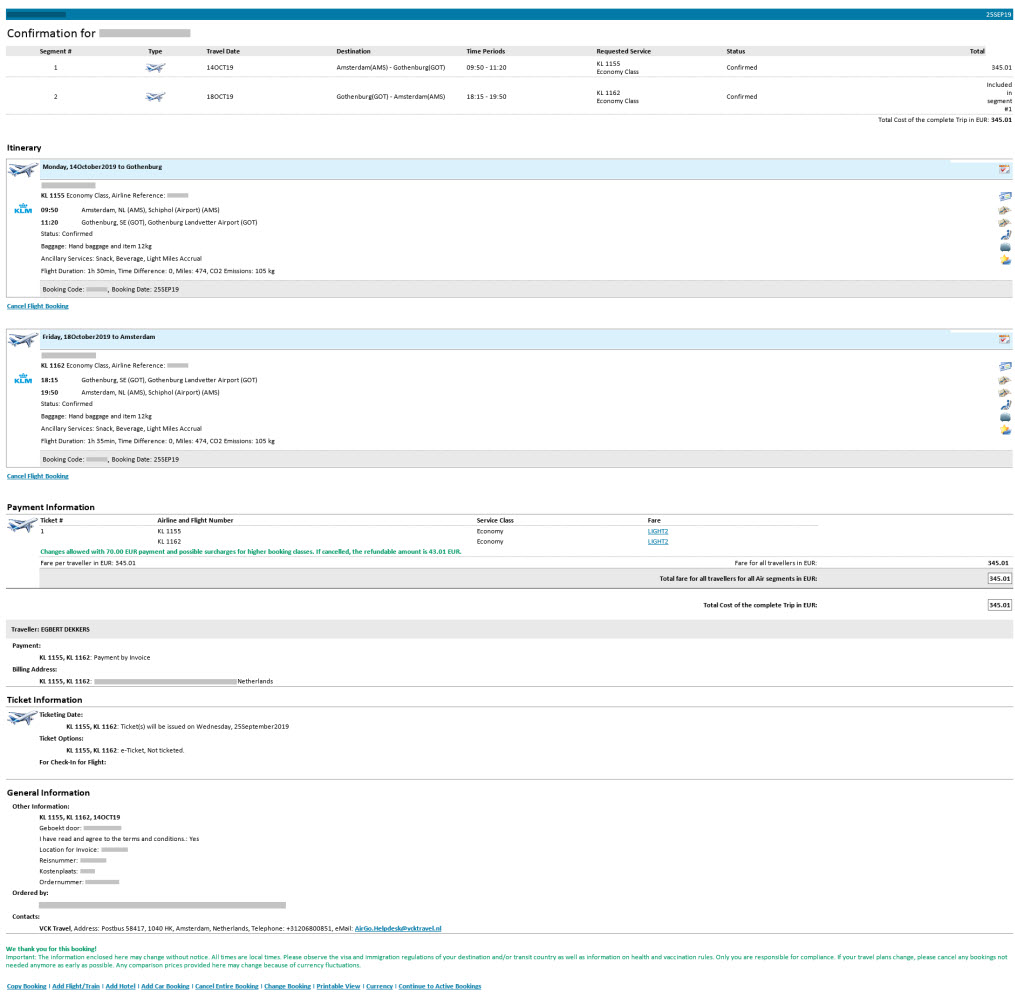
4. Confirmation e-mail
Below you can see the Conformation email the System will ALWAYS send. *Note: This may differ if your system works with an approval system.
*Click on the Images to inlarge them.*
×
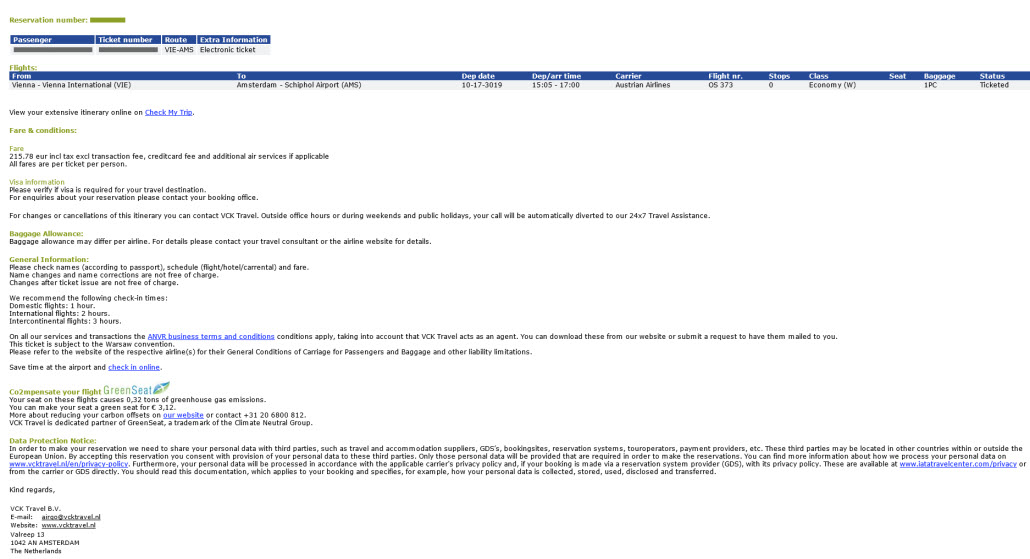
After the Conformation email, depending on the type of booking made, you will receive a second email.
"Regular Airlines" e.g. KLM, Delta, Swiss, Emirates, Icelandair etc....
You will receive the following mail with the E ticket number:
×
Low cost airlines (Instant purchase, indicated with a shopping cart icon ) e.g. Ryanair, Wizz Air, Transavia etc.... You will receive a separate mail from the lowcost carrier booked. (Only to the first email in the Travellers Profile)
*Note: This email may differ per Airline.
5. Icons
The icon next to the home button will show you a list with all the icons that are used in the online booking tool and in the confirmation e-mail.
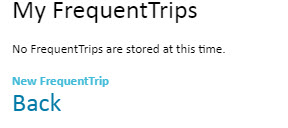
6. Adding FrequentTrips
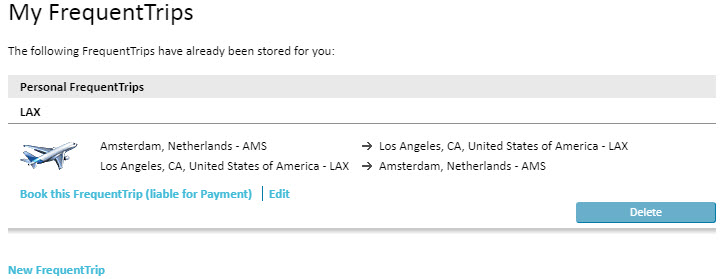
In the top right you will find the drop down menu with "My FrequentTrips"
Cick on it and it will take you the the following page.
Click on New FrequentTrip.
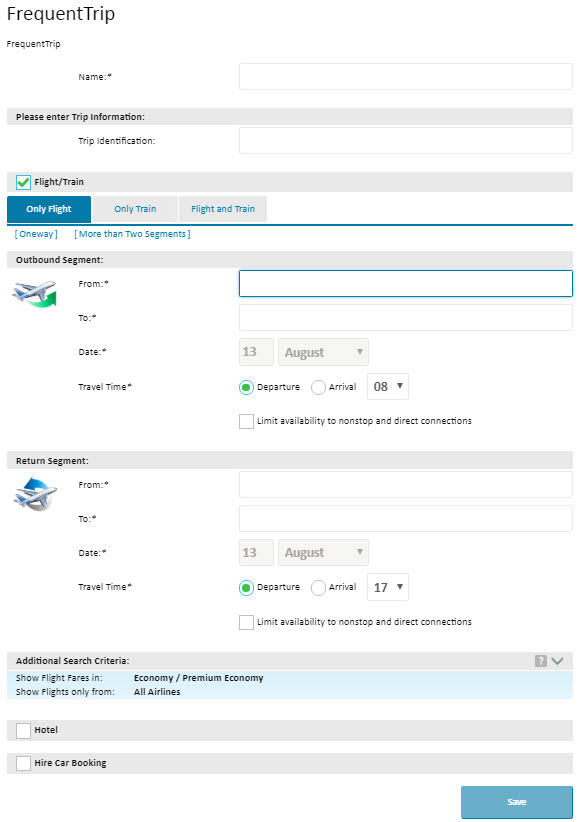
Add all information related to the trip and click on "Save"
To use the trip you just saved you can click on "Book this FrequentTrip"
On the next page you will be able to add and remove travellers.
After that you are able to change the location, date and time of the booking.
Click on "Continue" to search for the best available flights.
We offer a free tutorial video of the booking process here on Youtube.
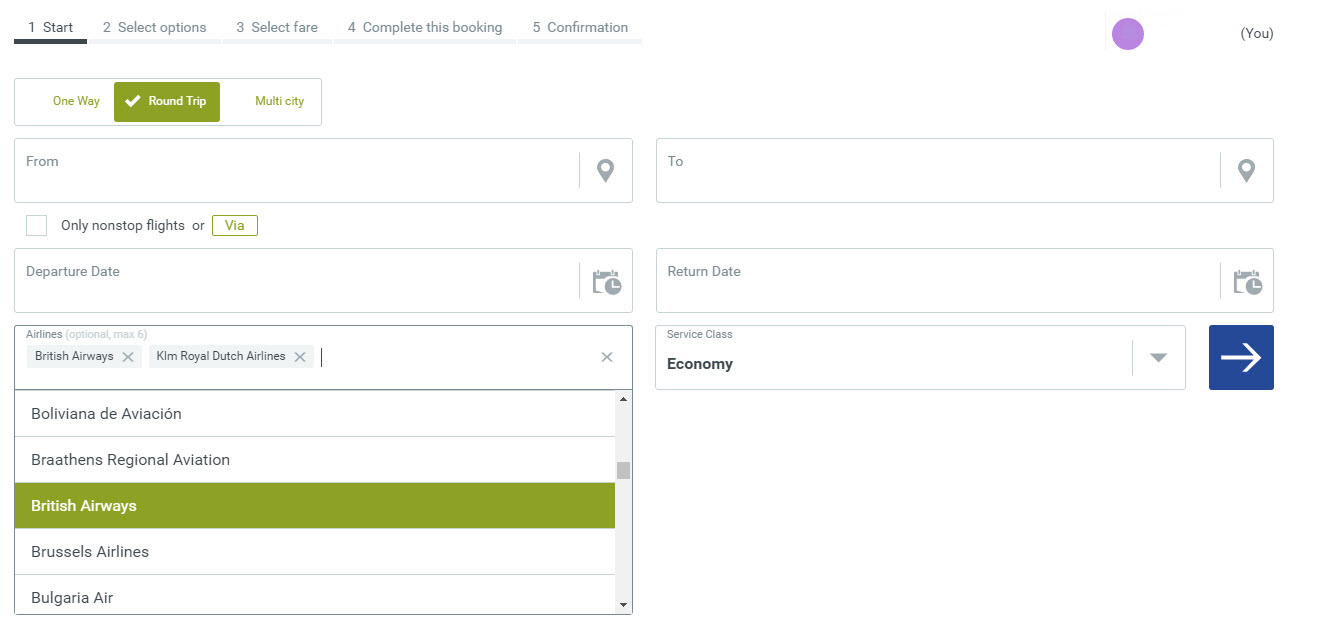
1. Pre-filter airlines
You can also pre-filter for an airline below at the flight booking page. Type in one (or more) of your preferred airlines. 2. Filter Tab
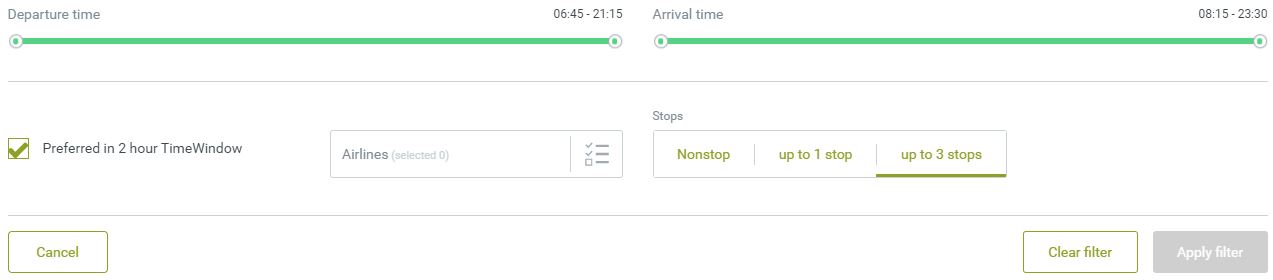
On the "2 Select flights" page you will see the filter icon
3. Meal request
Adding a preferred meal to your account can be done in:
Under
There you will find a dropdown bar with multiple dinner options.
After making your selection press Save at the bottom of the page.
*NOTE: The meals selected may not always be honored and may differ depending on the airline company and/or destination.
4. Amount of tickets
When booking returns the system can turn the fare in to 2 tickets.
Returns booked in 1 ticket can be identified with "Number of tickets: 1".
Returns booked with 2 tickets can be identified with "Number of tickets: 2"
We offer a free tutorial video of the booking process here on Youtube.
We offer a free tutorial video of the booking process here on Youtube.
1. Hotel search
When searching for a hotel we recommend typing in the destination and not the hotel name/chain.
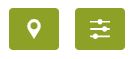
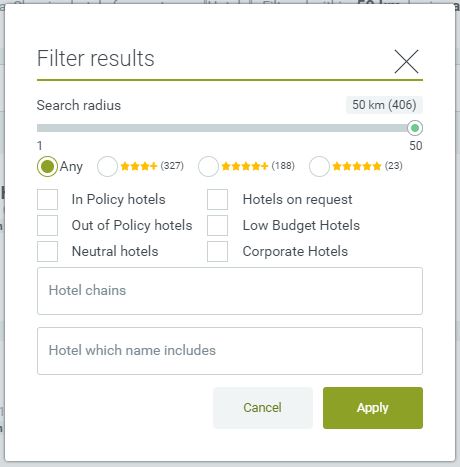
2. Hotel map and filter options
On the "2 Select hotel page" you will see the map and filter icon
The map will give you a top view of all the hotels within the chosen radius of your search criteria.
Click Show All Options on the "2 Select hotel page" for more options.
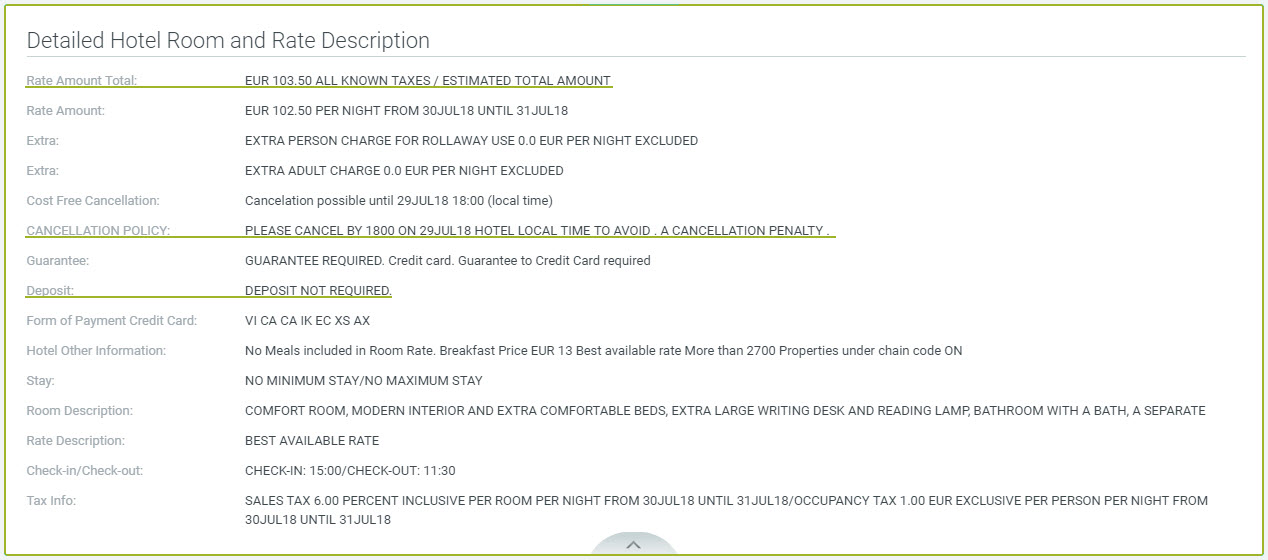
3. Hotel Description
On the "3 Select room" page, you will be able to select a room with different fare options.
To avoid confusion/wrong bookings, make sure to read it in full before booking.
We offer a free tutorial video of the renting proces here on Youtube.
1. Car search
When looking for pick-up and drop-off locations the airport is the best option, indicated with a airplane icon next to the name.
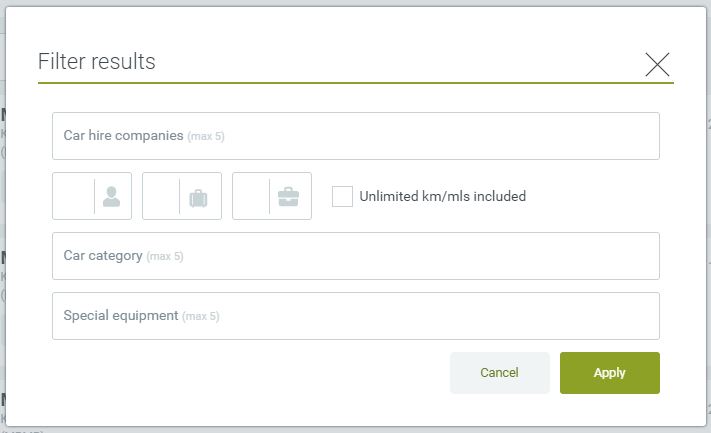
2.Filter Tab
On the "3 Select hire car" page you will see the filter icon.
1. Travel arranger dashboard
If you are a travel arranger and you want to start at the travel arranger dashboard when you login, please follow the steps below.
Go to My User Profile and click on Personal Preferences.
Scroll down the page and activate: Use Travel Arranger Dashboard(tm) automatically
Click on save.
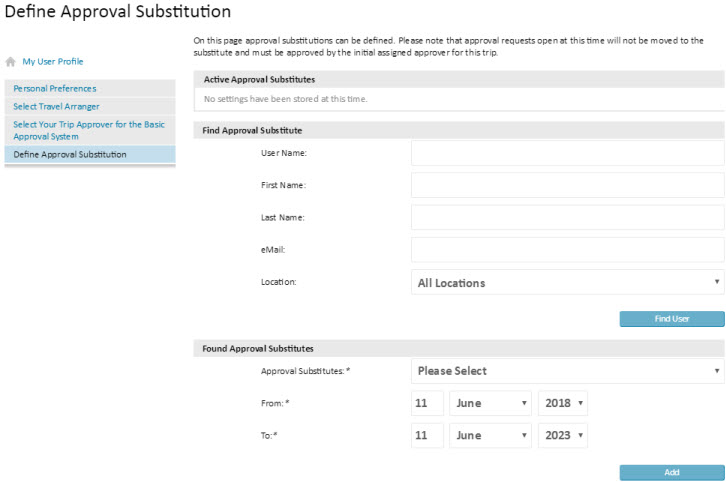
2. Approval substitution
If you are an approver, you will need to put in a substitute approver during your holiday, leave or absence. This person will take over your duties while you are not present in the office.
Follow the steps below:
Go to My User Profile and click on "Personal Preferences".
In the left mini menu you will find the option "Define Approval Substitution". Click on it.
Click on "Find User" and select one of the eligible users.
Please fill in the duration of your absence.
Click on "Add".
The selected user will be added to "Active Approval Substitutes" and will be removed automatically on the date you will return from your absence.
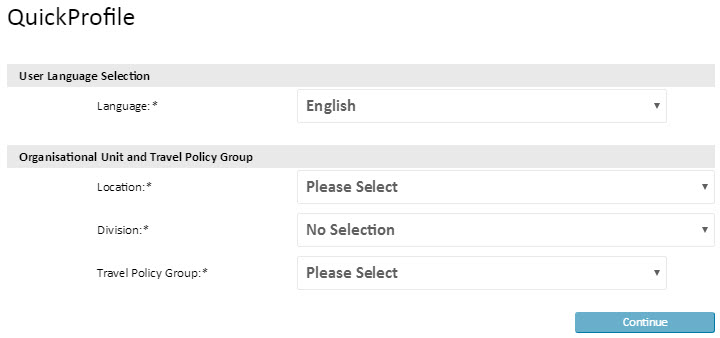
3. Creating new user/profile
Go to in the top bar to add a new user/profile.
Click on "Create New User".
Apply all the correct options before clicking on "Continue".
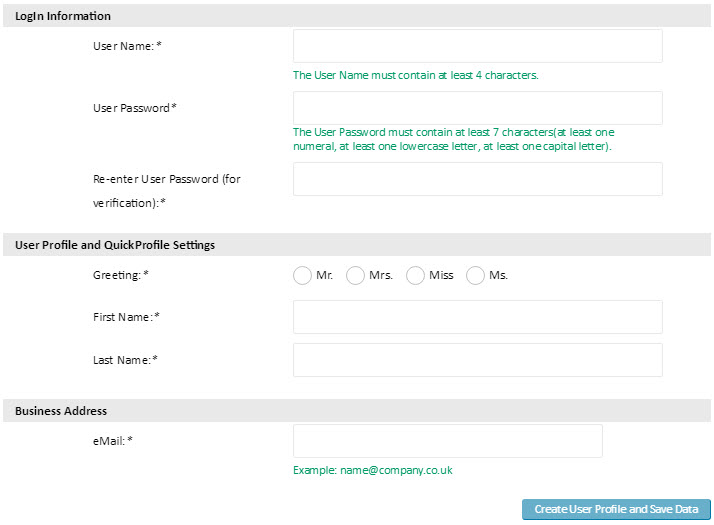
Fill in all mandatory fields * and click on "Create User Profile and Save Data".
If activated for your system, the new user/profile will receive an e-mail with all the necessary login details.
4. Adding/removing rights to users/profiles
Go to in the top bar to add rights to user/profile.
Click on "Edit User Access Rights".
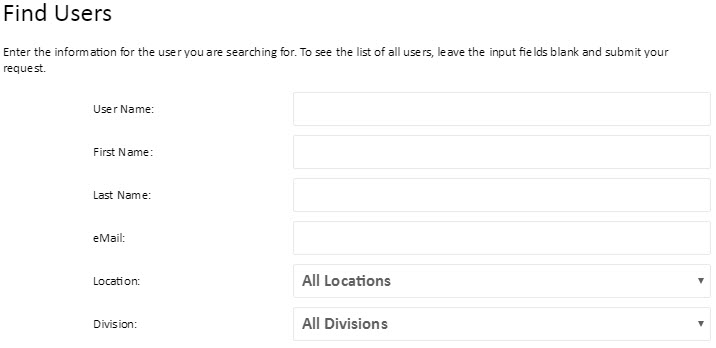
In order to give rights to users/profiles you need to find them.
Enter their name or filter a location/division and press enter or click on "Find".
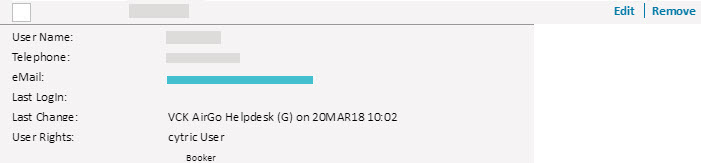
You will get a list of users/profiles that you can give rights to. Click on "Edit".
You will get a list of the rights that you can give/remove.
Once you've added/removed them, you can "Save" at the bottem of the page.
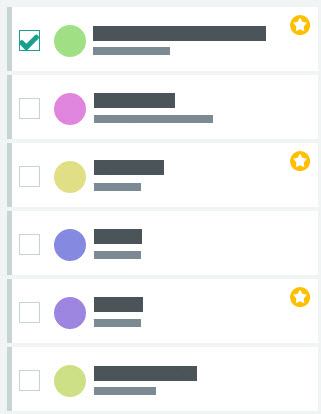
5. Adding favourite travellers.
If you have a large traveller list to work with and you don`t want to spend your time looking for college every time you log in, you can add them to your favourites.
To add a person to your favourite travellers, you will need to do is click on to greyed out golden star icon next to their name.
This will then turn gold.
All you have to do now is to turn on the filter "show only favourite travellers".
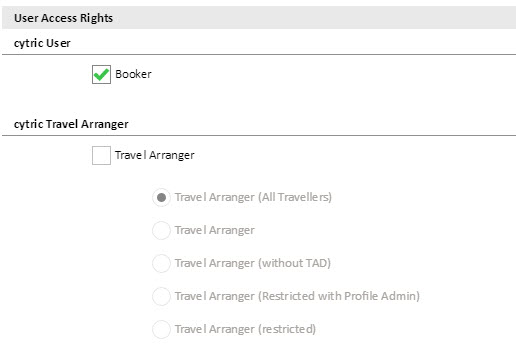
6. Arranger Rights
*NOTE: The following rights can only be given by arrangers with the role "User Access Rights Administrator".
Some of the rolls that can be added to users to make the Travel Arranger have multiple uses.
Travel Arranger (All Travelers):
- Can book for all travelers on the System.
- Can edit the profiles of all travelers of the system.
- Can create new users/travelers for all locations of the system.
Travel Arranger:
- Can book for the travelers assigned to him or for the location he is assigned to.
- Can edit the travelers assigned to him/her or for the location he is assigned to.
- Can create new users under his/her assigned location.
Travel Arranger (without TAD):
- Can book for the travelers assigned to him or for the location he is assigned to.
- can be a travel arranger without being able to see the calender with bookings.
Travel Arranger (Restricted with Profile Admin):
- Can book for the travelers assigned to him or for the location he is assigned to.
- Can only edit user/traveler profiles.
Travel Arranger (Restricted):
- Can book for the travelers assigned to him or for the location he is assigned to.
- Cannot make profiles.
- Cannot edit profiles.
AirGo helpdesk contact details
The AirGo helpdesk is available from Monday to Friday from 09:00 - 17:30
If you have a question while making your booking, please send screenshots with all the booking information to the AirGo helpdesk. They are happy to assist you.
* Some actions as mentioned in this manual, may not be available in your system.


 ) e.g. Ryanair, Wizz Air, Transavia etc.... You will receive a separate mail from the lowcost carrier booked. (Only to the first email in the Travellers Profile)


 in the top bar to add a new user/profile.